Learn how to properly install a fire ventilation damper

Fire dampers play an important role in ensuring the fire safety of a building. They stop the expansion of smoke and fire in fire-engulfed areas. Since a damper is activated when fire is initiated, it is especially important to install it correctly – it will enable the damper to properly serve its purpose.
Preparation for fire ventilation damper installation
Before initiating work, check if the damper is suitable for the planned application in a given type of space divider. Vertical space dividers are either flexible walls (plasterboard walls) or rigid walls (masonry, concrete). For floor slabs, the most commonly used material is reinforced concrete.
If the installation is to be placed at a certain distance from a space divider, it should be checked if the manufacturer has approved such a possibility. You should also note how the ventilation ducts are to be connected – it is stated in the operation and maintenance manual.
Minimum distances must be kept when installing dampers. According to the requirements of EN 1366- 2, article 13.6, the minimum distance between fire dampers is 200 mm, and the minimum distance between a fire damper and a structural element (wall or floor slab) is 75 mm.
The next step is to read the manufacturer recommendations on the damper installation and to assess the efficiency. This can be done by performing a full opening and closing cycle of the damper baffle (blades). The baffle should move smoothly.
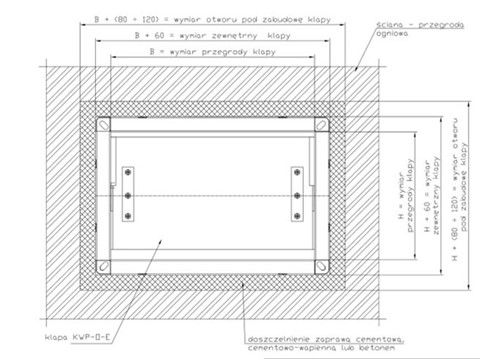
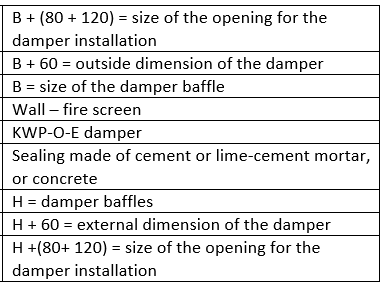
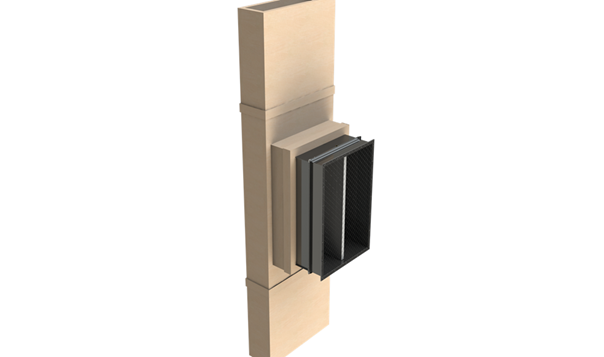
Fig. 1. Installation in a rigid wall – KWP-O damper
Fire damper installation – recommendations
In order to install a fire damper you need to make a mounting hole. It should be bigger than the damper by the size suggested by the manufacturer. The size of the gap should be selected based on the mounting materials. When placing a damper in the opening, the proper position of the damper in relation to the space divider must be maintained. It is necessary to verify the following dimensions: even installation gap, installation depth, diagonals of the damper, as well as the vertical and horizontal axes. When rectangular dampers are used, especially those with a cross-sectional area greater than 1 m², it is recommended to use wedges and a spacer to protect the body against compression during installation.
Then, fill the gaps between the damper body and the space divider with a material stated by the manufacturer. The interior of the damper shall be secured against dirt. We recommend securing the installation by means of paint or firestop sealant. Once the materials harden, test the operation of the damper (full opening and closing).
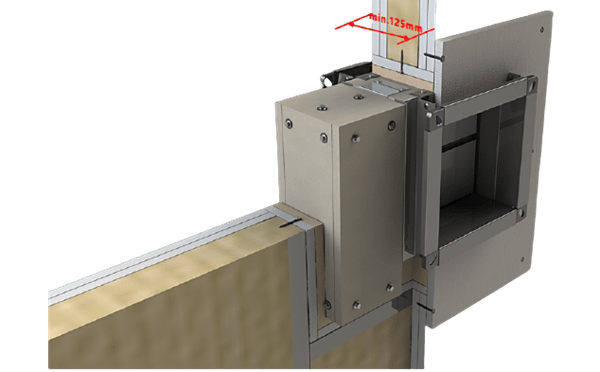
Fig. 2. Installation in a flexible wall – WKP-P damper
Fig. 3. Installation on a single-compartment duct – WKP-P damper

Fig. 4. and 5. Installation on a multi-compartment duct – KWP-P damper
When connecting the ventilation ducts, do not forget to seal the connection and to use the required type of suspensions and mounting clamps. Keep in mind that the fire damper must not be the support for the connected ducts. The ventilation ducts should be fitted with an independent suspension system withstanding the full load capacity of these ducts.

Photo 1. Installation of a single-blade damper using cement mortar
Często stosowaną praktyką jest dodatkowe zabezpieczenie zabudowy za pomocą farby lub masy ogniochronnej. Po utwardzeniu się materiałów należy przeprowadzić test działania klapy (pełne otwarcie i zamknięcie). Ruch przegrody (łopatek) klapy powinien być płynny, bez szarpnięć, a po zamknięciu nie powinny się pojawić żadne widoczne szczeliny.
Przy podłączaniu przewodów wentylacyjnych nie wolno zapomnieć o uszczelnieniu połączenia oraz zastosowaniu wymaganego rodzaju podwieszeń i klamer montażowych. Należy pamiętać, że klapa przeciwpożarowa nie może się stać podporą dla kanałów, które są do niej podłączane, ponieważ mogą one spowodować nadmierne obciążenie klapy i wygięcie jej obudowy, co uniemożliwi poprawne działanie klapy. Przewody wentylacyjne powinny mieć swój własny system zawieszeń, zapewniający pełną nośność tych przewodów. W przypadku klap transferowych zalecane, a często wymagane jest zastosowanie odpowiednich kratek lub maskownic. Przykładowa zabudowa klapy transferowej wielopłaszczyznowej z maskownicą została przedstawiona na zdjęciu 5.
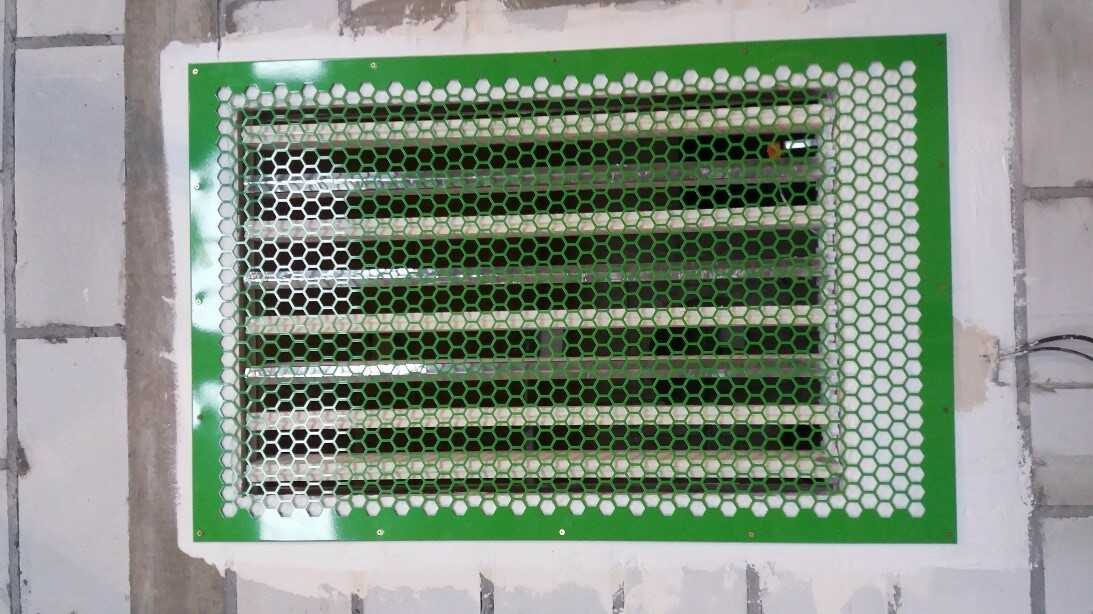
Zdjęcie 5. Zabudowa klapy wielopłaszczyznowej transferowej z maskownicą

KWP-P fire ventilation dampers
The KWP-P-E fire dampers are used in fire ventilation systems to prevent the expansion of fire, heat and smoke. Fire resistance rating of the dampers is as follows:
- EI 120 (vewd-i↔o) S1500C10000AAmulti,
- EI 120 (ved-i↔o) S1000C10000AAmulti.

WKP-P fire ventilation dampers
The WKP-P-E-W fire ventilation dampers are classified in the fire resistance range presented below and may be mounted in the following space dividers:
- EI 120 (ved-i↔o) S1000C300AAsingle,
- EI 120 (vew-i↔o) S1000C1000AAmulti.

WKP-O Fire, Transfer Dampers
The WKP-O multi-blade fire dampers are designed for installation at the edge of fire zones, in order to maintain separation and to protect evacuation measures in case of fire. The WKP-O dampers may also serve as transfer dampers. Fire resistance rating of this product is as follows:
- EI 120 (ve -i↔o) S.
You can find all SMAY products on www.smay.pl

